Video files produce by the VR.cam 02 webcam are standard (recorded in H264 mp4), and can be edited in a video software like Adobe Premiere.
The video format is 2:1 with SBS (Side by Side) synchronized video parts, one for each eye.
- Choose the Right Software:
- Not all video editing software supports VR180 editing natively. Look for software that does, such as Adobe Premiere Pro, Final Cut Pro X, Adobe After Effect, Mistika, DaVinci Resolve Studio or other VR-compatible editors.
- Update Your Software:
- Make sure your chosen software is up-to-date. VR support is often improved and added in newer versions.
- Import VR180 Footage:
- Import your VR180 video files into your chosen editing software. VR180 videos are typically formatted in side-by-side (SBS) stereoscopic format, with each eye’s perspective taking up half of the frame.
- Enable VR Mode:
- Activate the VR mode or 3D mode in your editing software. This is essential for correctly viewing and editing VR180 content.
- Adjust the Layout:
- Adjust the layout of the footage to make sure the left-eye and right-eye perspectives are properly aligned. Some software has specific tools for adjusting stereoscopic content.
- Edit as Normal:
- Once the VR mode is enabled, you can edit the VR180 footage just like any other video. Cut, trim, add effects, and make any necessary adjustments.
- Consider 3D Effects:
- Take advantage of the 3D nature of VR180 by experimenting with depth effects. However, be mindful not to overdo it, as excessive depth effects can be uncomfortable for viewers.
- Preview in VR:
- If possible, preview your edited VR180 content using a VR headset to ensure that the stereoscopic effect is working as intended. This can help identify any issues that might not be apparent on a standard monitor.
- Fisheye to Equirectangular Mapping:
- Use specialized software or scripts that can map the fisheye images to an equirectangular projection. This process involves unwrapping the fisheye distortion and remapping it to a standard equirectangular format (this can be done with Adobe Premiere or another Video software).
- Export Settings:
- When exporting your final video, ensure that you select settings compatible with VR180, such as maintaining the stereoscopic layout. This is crucial for proper playback on VR platforms.
- Test on VR Platforms:
- After exporting, test your video on VR platforms to ensure it looks and plays correctly. Some platforms, like YouTube or DeoVR, support VR180 content, so you can upload your edited video there.
Search on Youtube, you will find lots of video tutorial to explain how to edit VR180 files
How to live stream in VR180
You have many solutions to stream in live your webcam. But when you need to stream in 4k resolution, solutions became harder to find. And when you need real time and ultra low latency (sub second), it’s even more complecated.
We suggest some solutions to try a live VR180 stream expetience with your VR.cam 02 webcam. But of course, you can built or find your own solution. And in the future, we hope more video plateforms will allow and develop such services, to promote the VR 180 immersive video format.
Use OBS – Open Broadcaster Software
We suggest to use OBS, a free software, dedicated to live broadcast. You can also record localy your webcam stream and edit files in an video editor later.
1 – Download & Install OBS (free)
OBS Studio is a free and open-source app for screencasting and live streaming.
https://obsproject.com/download

2 – Configure the scene size
Enter the setting menu, and manage the scene size (resolution). Enter 3840×1920, the max resolution of our VR.cam 02 webcam. We suppose you want to publish a 4k live stream.

3 – Add a new Video Capture Device
Plug your VR.cam 02 Webcam to your computer and click the add button in the sources zone and add a new video capture device and enter a name for this device.


4 – Webcam options
Select the right resolution and framerate (3840×1920 @ 30fps). You should have your video preview in your scene using the full width & height

Using OBS & Dolby.io
We suggest you a free solution to try live VR180 stream in 4k, with ultra low latency, sub second delay and using our home made online viewer (made in JS with BabylonJS).
Prepare your OBS environment with the previous step.
1 – Create a Dolby.io (free demo account)
We suggest you to create a free demo account at Dolby.io. A very qualitative streaming service, able to share real time live streams in 4k, with a sub second latency.
With this free account, you have acces to 50 GiB (In & Out Bandwidth)

2 – Copy / Paste credentials and WHIP endpoint
Go to the streaming dashboard and manage the Server Url and Token. Copy / Paste them to OBS in the Settings / Stream tab.
We use WebRTC to produce real time live 4 stream (in settings part).


3 – Select bandwidth and Video codec
Depending of the quality of your network connexion and computer ressources. You have to adjust the output bandwidth and video format (codec).
You can test H264, H265 and VP9.
About the bandwidth, in 4k, you need at least 6 Mbps and if you can, try up to 20 Mbps.

4 – Start streaming
Click at start streaming

5 – Test the stream
Open the Dolby.io player and verify if everything is ok (quality, frame rate)

6 – Watch the stream in a headset using our web js player
Last step, the easiest one. Watch the result in a VR heaset like Oculus Quest 2, Meta Quest Pro, Meta Quest 3, Pico 4 or another VR headset with a web browser.
For this, go to https://www.vr.cam/live/
And Copy / Paste the url of the Hosted Dolby.io player. We generate for you a short url you can open in your VR headset.


Free dedicated JS VR Player
Test online (better with a VR headset). We propose a dedicated simple VR player, based on BabylonJS
https://vr.cam/video/ or https://vr.cam/video/?v=magic
Feel free to use, edit, modify or update the JS player !
![]()
The source code is available for free on github

Using OBS & Youtube Studio
Using Youtube and Youtube Studio, you can’t publish a clean VR180 live stream with low latency. But in order to test the stream and the immersive feeling in your headset, you can try quickly.
You can’t publish in 4k directly using your browser, so you have to use a broadcast sofware like OBS (free software) and stream with your Youtube credentials.
Use OBS software with your youtube api key and stream in 4k. It’s very simple to configure.
Flag the video stream as a 360 VR video.
And watch your stream in a VR headset (live Oculus Quest 2, Meta Quest Pro, Meta Quest 3, Pico 4 or another VR headset with a compatible browser). In fullscreen, you will be able to choose the format (SBS VR 180).
The video will probably have about 30s delay and Youtube re-encore the stream with some strong parameters, decreasing the video stream quality.
1 – Create a Youbube account
We suppose you already have a Youtube account and you have acces to Youtube Studio. If it’s not yet the case, signup in Youtube.
2 – Copy / Paste credentials
Go to the live streaming dashboard and manage the Token. Copy / Paste them to OBS in the Settings / Stream tab.
You can also connect directly your Youtube account to OBS.


3 – Select bandwidth and Video codec
Depending of the quality of your network connexion and computer ressources. You have to adjust the output bandwidth and video format (codec).
You can test H264, H265 and VP9.
About the bandwidth, in 4k, you need at least 6 Mbps and if you can, try up to 20 Mbps.
Youtube recommend 20 Mbps for 4k live stream : https://support.google.com/youtube/answer/78358
4 – Start streaming
Click at start streaming

How to record VR180 files
Video files produce by the VR.cam 02 webcam are standard (recorded in H264 mp4 for example), and can be edited in a video software like Adobe Premiere.
The video format is 2:1 with SBS (Side by Side) synchronized video parts, one for each eye.
VR.cam 02 is a USB-C webcam si you can connect it to a computer and record the video stream with your favorite video software (with the right résolution, video frame rate and codec). You can also record video using your smartphone, con necting the USB-C webcam to your Android device (using an OTG cable adapter). Then you can use a free app to record this external video stream.
Record on your computer
To record a webcam stream on your computer, you can use various software applications that allow you to capture video from your USB-C VR.cam 02 VR180 webcam.
- Select Webcam Recording Software:
- Choose a webcam recording application that suits your needs. Some popular options include OBS Studio, Camtasia, Bandicam, ManyCam, and Cheese (for Linux users).
- Download, Install and Launch the Software:
- Download the chosen webcam recording software from the official website and follow the installation instructions.
- Select Webcam Source:
- Within the software, look for options to select your webcam as the video source (VR.cam 02). This is usually found in the settings or configuration menu.
- Adjust Recording Settings:
- Configure the recording settings, such as resolution, frame rate, and audio settings. Make sure the audio source is set to capture your microphone if you want to record audio.
- Be sure to allow enough bandwidth for the video stream (around 40Mb/s for a 4k stream.
- Select the right video codec (H264, H265, AV1, VP9, etc …), depending your system capabilities and you project. There is no single best video codec, as your choice will entirely depend on your needs. Are you looking for the best codec for online videos, or are you perhaps thinking about getting into live streaming?
- Start Recording:
- Once you’ve configured the settings, start recording. Some software may provide options to use hotkeys for starting and stopping the recording.
- Stop Recording:
- When you’ve finished recording your show, stop the webcam recording software. The recorded video will be saved to a location on your computer as specified in the software settings.
- Edit the Recorded Video (Optional):
- If needed, you can use video editing software (Adobe Premiere Pro or Final Cut Pro X, etc …) to make edits or enhancements to the recorded video.
OTG cable or adapter
An OTG or On The Go adapter (sometimes called an OTG cable, or OTG connector) allows you to connect an external device (the VR.cam 02 Webcam or an USB flash drive) cable to your phone or tablet through the Micro USB or USB-C charging port.
You may have gotten one in the box when you purchased your smartphone, although they can also be purchased seperately from lots of major retailers.
It allows the transfer of data as well as connectivity to peripherals.


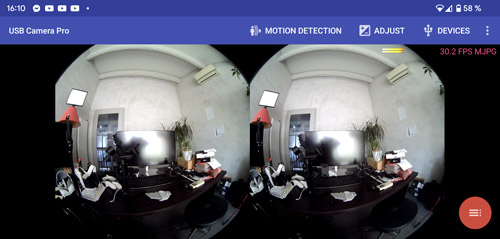
Mobile application
You can connect your USB-C webcam VR.cam 02 to an android device (a smartphone or a tablet). You need a OTG (On The Go) adapter (sometimes called an OTG cable, or OTG connector), in order the VR.cam 02 webcam to be recognized as an external camera device.
Unfortunately, for the moment and for what we know, the Android OS do not recognize and do not use by default an external device, so you need to install and use some free app to manage and record video streams.
Free App Example :
![]()
USB Camera
Stabilization
Stabilization is crucial for VR180 videos for several reasons, as it directly impacts the viewer’s experience and the overall quality of the content.
Reduced Motion Sickness:
VR experiences are more immersive when there’s minimal camera shake or movement. Unstable or shaky VR180 videos can contribute to motion sickness in viewers. By applying stabilization, you help create a more comfortable and enjoyable experience, minimizing the risk of discomfort or nausea.
To achieve stabilization for VR180 videos, various techniques and tools can be employed, such as using software-based stabilization algorithms in post production or physical stabilization equipment during the recording process. The goal is to create a seamless and immersive experience that enhances the storytelling and engagement within the virtual environment.
Example of stabilized gimble, used with a smartphone mount (ZHIYUN Crane 2S).

How to view VR180 files in a VR headset
You can easely acces to your video files in your VR headset (Meta Quest 3 for example) using a video player (like SkyBox or DeoVR).
You can upload your video files in your headset or acces to your videos using your local network (share a directory in your local network).